Spray Painting Checklist: 10 Steps for Even Industrial Coverage
This guide lists ten checks for even industrial spray coating. It covers surface preparation, equipment setup, environmental controls, and post-application inspection. It helps prevent common defects in professional coating projects.
- Verify surface profile and cleanliness before spraying to ensure proper adhesion and coverage.
- Calibrate nozzle pressure and travel speed to match the specific coating viscosity.
- Monitor ambient temperature and humidity to prevent flashing, sagging, or poor drying.
- Inspect the wet film for pinholes, runs, and dry spray to catch defects early.
- Document all settings and observations to support quality assurance and future troubleshooting.
Prepare the Surface
The surface is the foundation of any spray coating job. If the substrate is dirty or poorly prepared, the paint will not bond correctly. This leads to peeling, blistering, or flaking within months. The integrity of the coating system depends entirely on the quality of the interface between the primer or topcoat and the base material. A clean, sound substrate provides the mechanical anchor points needed for long-term durability.
Start by removing loose rust, old paint, and contaminants. For steel, use wire wheels or abrasive blasting to reach bare metal in areas of active corrosion. For non-ferrous metals, use non-sparking tools to prevent ignition risks from combustible dust. Use appropriate abrasives or chemical strippers based on the material. Chemical strippers are effective for removing thick, cured layers, but they often require a thorough water rinse and drying process afterward.
After cleaning, degrease the area thoroughly. Use a solvent that is compatible with the coating system. Common solvents include mineral spirits for oil-based systems and isopropyl alcohol for water-based systems. Wipe the surface with a clean, lint-free cloth until no residue transfers to the cloth. This step is critical because even traces of oil or grease can prevent the coating from wetting the metal properly.
Check the surface profile. The roughness needs to match the coating manufacturer’s requirements. Too smooth and the paint may not grip. Too rough and the coating may not level out properly. Use a surface profile gauge to measure this. A typical target for high-performance coatings is a profile in the range of 3 to 6 mils, but always verify against the Technical Data Sheet (TDS) for the specific product.
Red flags:
- Visible oil or grease spots that resist wiping.
- Blistered or chalky old coating that does not remove cleanly.
- Uneven profile that exceeds the specified tolerance.
Calibrate the Equipment
Spray guns and applicators must be tuned to the specific product. A generic setting rarely works for all paints. Viscosity, atomization, and pattern shape depend on the equipment settings. The nozzle size, fluid tip, and air cap must be selected to match the viscosity of the coating. A standard 26-degree air cap is common for general use, but high-velocity nozzles are required for thicker, more viscous industrial primers.
Clean the nozzle thoroughly before use. Old paint residues cause clogs and uneven spray patterns. Disassemble the gun and soak the fluid tip in a compatible thinner. Run the gun without fluid to clear any trapped solvent. Check the air compressor for stable pressure. Fluctuations in air supply create banding or dry spots on the panel. A regulator with a pressure gauge is a minimum requirement, and a pressure regulator with a filter is better.
Adjust the fan width to cover the work area efficiently. A pattern that is too narrow creates overlap lines. A pattern that is too wide wastes material and creates uneven edges. The fan shape should be circular and symmetrical. If the pattern is lopsided, the air cap may be damaged or the gun may be misaligned.
Red flags:
- Atomized spray that lands as droplets instead of a fine mist.
- Uneven fan width with a narrow center and wide edges.
- Pressure gauge that swings wildly during operation.
Control the Environment
Ambient conditions affect how the coating behaves on the surface. Temperature and humidity directly impact drying time and film formation. The coating is a liquid that must evaporate its solvent content to form a solid film. Environmental variables control the rate of this evaporation.
Keep the work area within the recommended temperature range for the specific product. Too cold and the paint may not flow well. Too hot and it may dry too fast before leveling. Water-based coatings generally require higher temperatures to dry effectively, often exceeding 60 degrees Fahrenheit. Oil-based systems can be slower to dry in cold conditions but are less sensitive to humidity.
Monitor relative humidity. High humidity can cause condensation on cold surfaces. This creates moisture entrapment and blistering. Low humidity can cause the coating to dry too quickly, leading to poor leveling. The dew point is the critical threshold. The surface temperature must be at least 5 degrees Fahrenheit above the dew point to prevent condensation from forming on the substrate.
Consider airflow. Drafts can dry one side of a panel faster than the other. This creates uneven color or thickness. Use curtains or barriers to control air movement near the work area. In a spray booth, the airflow is designed to carry solvent vapors away from the operator and the wet film. Natural air movement in an open shop can disrupt this balance.
Red flags:
- Condensation forming on metal surfaces before spraying.
- Visible dust or debris falling onto wet coats.
- Temperature changes during the application window.
Mix the Coating Properly
Mixing ratio is critical for performance. Using the wrong ratio changes the chemical and physical properties of the paint. Two-part coatings, such as epoxy or polyurethane, require a precise mix ratio to cure correctly. If the ratio is off, the film may remain soft, develop a tacky surface, or fail to achieve its rated hardness.
Measure components using calibrated containers. Do not estimate volumes by eye. This leads to inconsistent performance and potential warranty issues. A graduated cylinder or a digital scale is necessary for accuracy. Weighing components is often more accurate than measuring volume, especially for liquids with different densities.
Mix the paint thoroughly but gently. Avoid introducing air bubbles. Stir with a low-speed mixer for the time specified by the manufacturer. Over-stirring can introduce air, which becomes trapped in the wet film and creates pinholes. Under-stirring leaves the components unmixed, leading to a weak film.
Check the viscosity. If the paint has thickened, do not just add thinner. This changes the chemical balance. If the paint is too thin, it may not build up enough coverage. The viscosity should be within the range specified by the manufacturer, typically measured with a Ford cup or a Zahn cup.
Red flags:
- Separation of components after mixing.
- Paint that splatters instead of atomizing smoothly.
- Inconsistent color between batches due to mixing errors.
Set the Travel Speed
Travel speed determines how much material is deposited per pass. Move the gun too slow and the coating will sag or run. Move it too fast and you will get dry spray or pinholes. The goal is to lay down a uniform film that is wet enough to level out but not so wet that it flows off the vertical surfaces.
Establish a consistent speed based on the recommended coverage rate. Practice on a scrap piece first. This allows you to see the pattern without risking a production part. Hold the gun at a consistent distance, typically 6 to 8 inches from the surface. This distance allows the spray to fully expand before hitting the substrate.
Maintain a constant distance from the surface. Changing the distance changes the atomization. Closer creates a heavier deposit. Farther creates a lighter one. If the gun is held too close, the solvent content is high, and the paint will not evaporate quickly enough, leading to sagging. If held too far, the spray is too fine and may not build up enough thickness.
Red flags:
- Drip lines or sags on vertical surfaces.
- Dry, chalky finish with visible brush marks.
- Inconsistent overlap between passes.
Apply Multiple Coats
Most industrial coatings require multiple thin coats. One thick coat rarely levels properly. It also dries unevenly and traps solvents. Thin coats dry faster and more uniformly, reducing the risk of defects like sagging and orange peel.
Apply the first coat at a lower volume. This is called a flash coat. It wets the surface and helps adhesion. Let it dry to the touch before the next pass. The flash coat is not intended to build up thickness; its purpose is to ensure the surface is fully wet and that the next coat bonds properly.
Apply subsequent coats at the recommended thickness. Follow the manufacturer’s re-coat window. This is the time allowed between coats for proper bonding. If you wait too long, the previous coat will be too hard to bond with, leading to intercoat failure. If you spray too soon, the solvent content of the previous coat will be disturbed, causing blushing or solvent popping.
Check the previous coat before applying the next. If there are defects, correct them now. It is harder to fix dry defects than wet ones. A small spot of dry spray can be wetted out and re-sprayed while the film is still open. Once it cures, it requires sanding and repainting.
Red flags:
- Poor adhesion between coats (tack test fails).
- Solvent bubbles trapped between layers.
- Color shifting due to uneven coat thickness.
Manage Overspray Control
Overspray wastes material and creates dust. It can also contaminate nearby surfaces. In a production environment, overspray is a major cost factor and a safety hazard. It reduces the efficiency of the application process and can lead to uneven film thickness on the target part.
Use drop cloths or masking tape to protect adjacent areas. This is essential for complex assemblies. Masking tape can be used to protect sensitive surfaces, but it is not a substitute for proper spray technique. If you must mask, apply the tape firmly to ensure the coating does not seep underneath.
Position the spray gun to minimize waste. A well-controlled pattern reduces the amount of paint that misses the target. Keep the gun moving and maintain a consistent distance. If the pattern is too wide, more paint will land on the surrounding area. Adjust the fan shape to match the size of the part being coated.
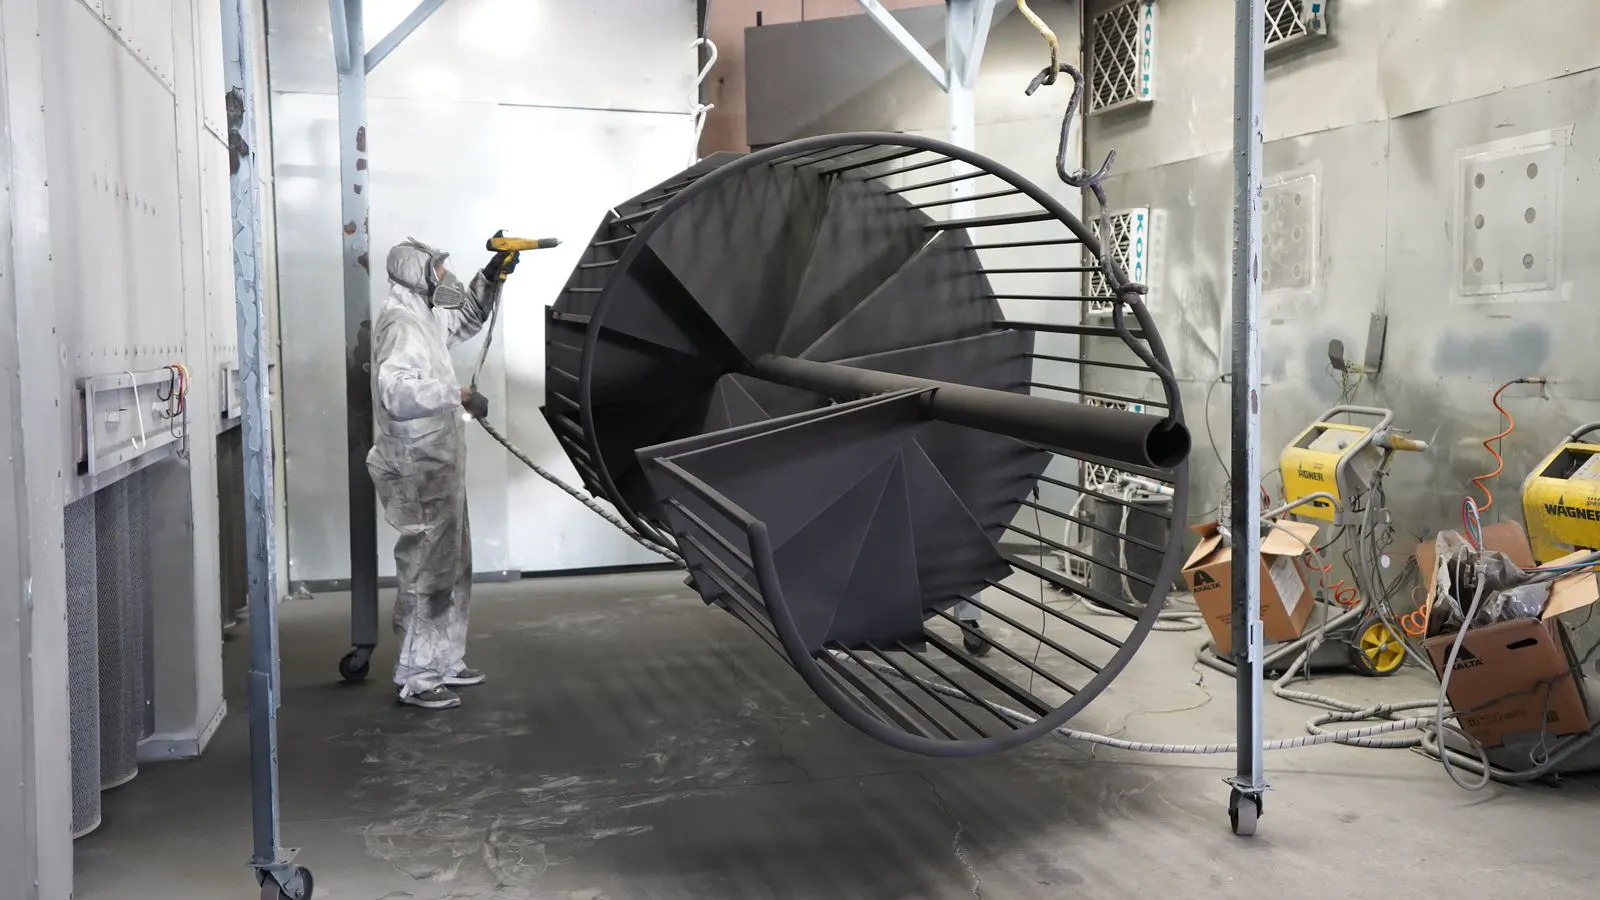
Consider using a spray booth if available. These enclose the work area and capture overspray with filtration systems. A spray booth also protects the operator from solvent vapors and dust. If a booth is not available, ensure the work area is well-ventilated and that the floor is covered to prevent slips and environmental contamination.
Red flags:
- Paint buildup on floors or equipment.
- Unmasked areas showing speckled contamination.
- High material consumption rates compared to estimates.
Inspect the Wet Film
Visual inspection of the wet film catches problems early. Waiting for the coating to cure makes defects harder to fix. The wet film is the best time to identify issues related to application technique, equipment calibration, or environmental conditions.
Look for runs, sags, and dry spray. These are signs of incorrect speed, pressure, or viscosity. Runs occur when the film is too thick or the surface is too hot. Dry spray occurs when the atomization is poor or the air pressure is too high. Both defects require the wet film to be corrected.
Check for pinholes. Small pinholes can expand during curing. They are often caused by contamination or rapid drying. Pinholes can be caused by oil or grease on the substrate, or by applying the coating too quickly after the previous coat. They can also be caused by applying the coating in a high-humidity environment where moisture is present.
Inspect for orange peel. This is a texture defect where the surface looks like the skin of an orange. It indicates poor leveling. Orange peel is often caused by applying the coat too thickly or in a low-humidity environment where the solvent evaporates too quickly. It can also be caused by a surface profile that is too rough.
Red flags:
- Visible drips that are still wet.
- Small pinholes scattered across the surface.
- Uneven texture with peaks and valleys.
Document Settings and Conditions
Record all parameters used during the application. This creates a baseline for future work and helps with troubleshooting. A detailed log is a valuable tool for maintaining quality and consistency. It allows you to compare results from one batch to the next and identify trends.
Write down the air pressure, travel speed, nozzle size, and material ratio. Note the temperature and humidity readings. These data points are essential for diagnosing problems. If a defect occurs, you can refer to the log to see if there were any deviations from the standard procedure.
Keep a log of any deviations. If you had to adjust settings, note why. This information is valuable for quality control. For example, if you had to increase the air pressure because the viscosity was too high, note this in the log. This will help you identify if there is a problem with the mixing process or the environmental conditions.
Red flags:
- No record of equipment settings.
- Missing environmental data.
- Vague notes that do not explain changes.
Final Quality Check
After the coating cures, perform a final inspection. This verifies that the finish meets specifications. The cured film is the final product, and any defects that are present are permanent. A thorough inspection ensures that the coating is ready for service.
Check the gloss level with a gloss meter. It should be within the specified range. Gloss is an indicator of film thickness and leveling. A high-gloss finish indicates a smooth, even film. A low-gloss finish may indicate poor leveling or contamination.
Inspect the color match. Use a standard light source for comparison. Color can shift depending on the angle of light and the surface texture. A standard light source ensures that the color is evaluated under consistent conditions.
Test adhesion if required. Use a tape test or pull-off tester according to industry standards. Adhesion is a critical property of the coating. A coating that does not adhere properly will fail prematurely. The tape test is a quick, non-destructive method to check adhesion. The pull-off tester provides a quantitative measure of adhesion strength.
Red flags:
- Gloss variation between panels.
- Color mismatch against the standard.
- Adhesion failure during testing.
Summary Table
| Check | Target | Defect Risk |
|---|---|---|
| Surface Profile | Manufacturer spec | Poor adhesion |
| Air Pressure | Stable, calibrated | Dry spray / Runs |
| Travel Speed | Consistent, measured | Sagging / Pinholes |
| Humidity | Below dew point | Blistering |
| Mix Ratio | Exact, measured | Poor performance |
| Wet Film | Uniform, defect-free | Orange peel |
Frequently asked questions
How do I know if my surface is ready for spray coating?
The surface must be clean, dry, and free of contaminants. It should also have the correct profile and mechanical bond for the specific coating system.
What is the best travel speed for spray painting?
There is no single best speed. It depends on the gun, nozzle, material, and desired thickness. Start with the manufacturer's recommendation and adjust based on results.
Why is humidity a problem during coating?
High humidity can cause condensation on cold metal surfaces. This leads to blistering and poor adhesion. It can also slow down drying times.
Can I spray paint in a cold environment?
It is possible, but you must use products formulated for low temperatures. Cold air slows solvent evaporation, which can lead to defects.
How often should I clean my spray gun?
Clean it after every use and after changing colors or materials. This prevents clogs and ensures a consistent spray pattern.