How to Apply Industrial Coatings: Step-by-Step Guide
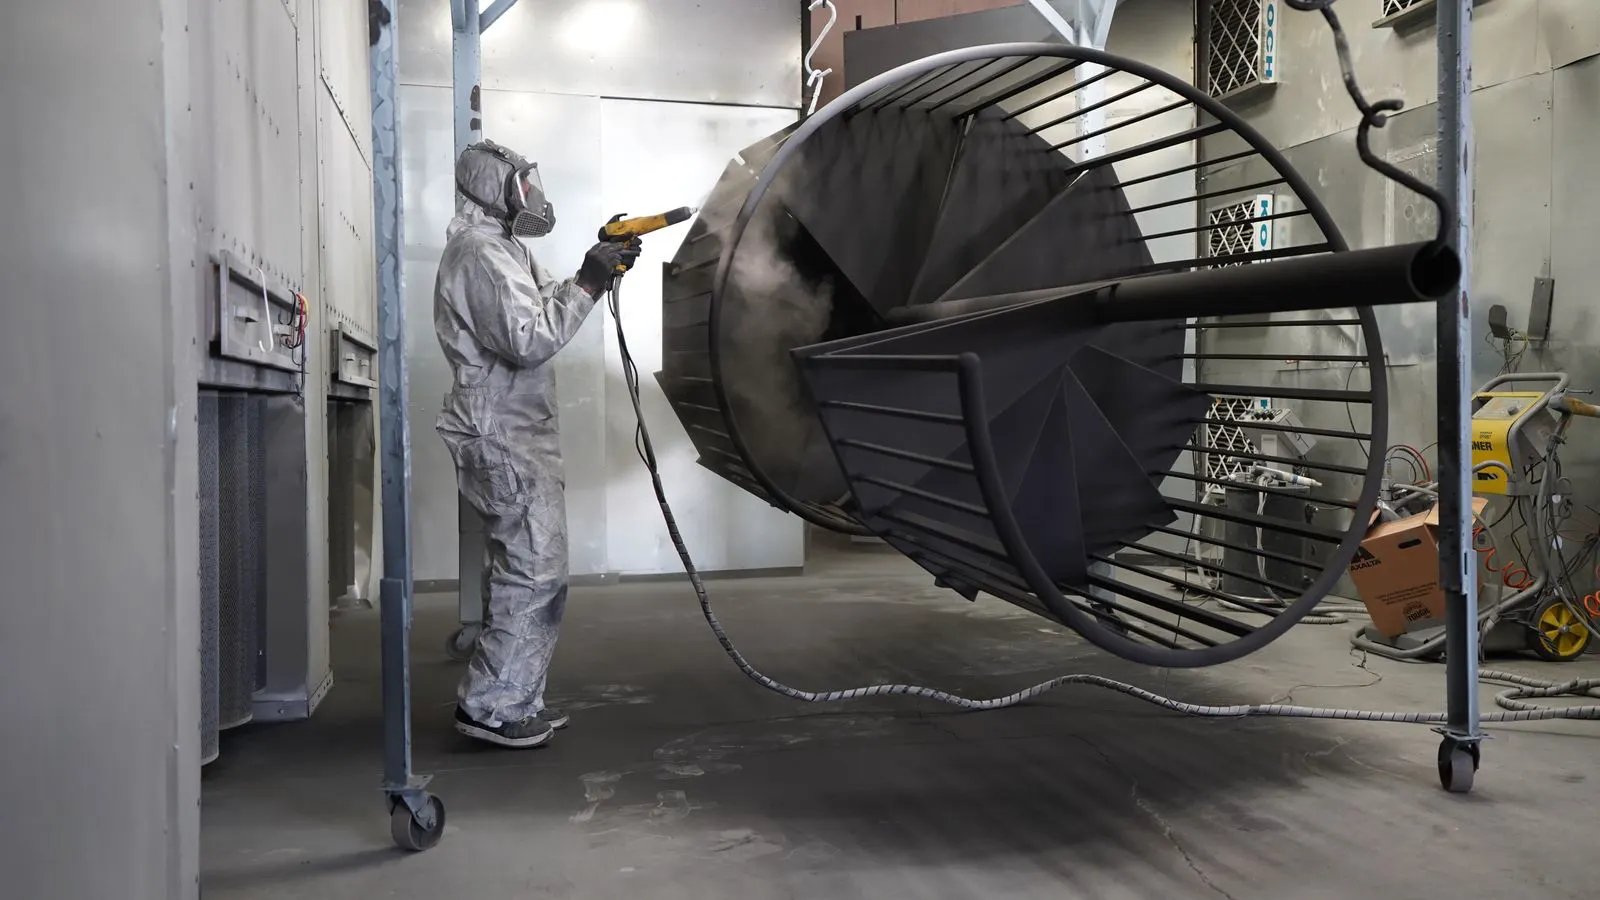
Correct industrial coating application depends on rigorous surface preparation, proper application methods, and final verification. This guide outlines the specific steps engineers and contractors need to ensure proper adhesion, corrosion resistance, and durability for industrial coating application projects.
- Surface preparation determines more than 80 percent of long-term coating performance.
- Application method must match the coating type, substrate, and required film thickness.
- Verification steps catch defects before they become costly field failures.
- Environmental conditions like temperature and humidity affect drying and adhesion.
- Documentation of every step supports warranty claims and quality control.
Why Preparation Drives Performance
The failure of most industrial coating systems starts before the first drop of paint hits the steel. If the substrate holds oil, rust, or dust, the binder has nothing to grip. The coating may look smooth in the booth, but it will blister, peel, or flake within a year. Engineers and contractors must treat surface preparation as the primary application step, not a setup task.
The correct industrial coating application sequence begins with a written specification. The coating data sheet dictates the minimum surface profile, maximum contaminant level, and required drying time. Without these numbers, application becomes guesswork. A specification defines the target dry film thickness per coat, the allowable flash-off time at a standard temperature, and the minimum adhesion rating required for the specific service environment.
Surface preparation also defines the cost structure. Grinding a surface to the right profile is labor intensive. Skipping that step to save time on the surface usually doubles the cost later through touch-up repairs or complete recoating. A poorly prepared edge will rust through a perfectly coated panel. The initial investment in proper abrasion or mechanical cleaning prevents the expensive failure of the entire system.
Understanding Substrate Conditions
Before any abrasive work, the engineer must identify what the substrate actually is. Hot-rolled steel, pickled steel, and previously coated steel behave differently. Hot-rolled steel often carries mill scale, which must be removed. Mill scale is a layer of iron oxide formed during the rolling process. It is porous and adheres poorly to paint. If left in place, it acts as a reservoir for moisture and accelerates corrosion from the inside of the coating film.
Pickled steel may have residual salts that need neutralization. Chemical pickling removes rust and scale, but it leaves behind chlorides and sulfuric acid residues. These salts are hygroscopic, meaning they draw water from the air. Even if the part dries out, the salts remain. During application, these residues can migrate to the surface and cause blistering or salt bloom.
Previously coated steel requires a different approach. The existing film may be sound or failing. A sound film can sometimes be cleaned and sanded. A failing film must be stripped back to bare metal. The decision rests on adhesion testing, not visual inspection alone. A coating that looks intact may have delaminated at the boundary with the substrate. A pull-off test reveals the true bond strength.
A common mistake is applying a new system over a contaminated old system. Solvent wipes can remove loose dust, but they cannot dissolve deeply embedded grease. Solvent wipes can remove loose dust, but they cannot dissolve deeply embedded grease. If the old paint is failing, the new system will inherit the weakness. The only reliable solution is to remove the failing film entirely.
Selecting the Right Application Method
The application process must align with the coating chemistry. Waterborne systems require different equipment than solvent-borne systems. High-solids systems need different pressure settings than low-solids systems. Waterborne paints have high viscosity and require equipment that can handle the pressure without atomizing the droplets too finely. Solvent-borne paints flow more easily but require strict control to prevent overspray and flash-off issues.
Spray application dominates industrial work. Airless sprayers handle high-solids and heavy-duty systems. They force the paint through a small orifice at high pressure, creating a fine mist. This method delivers high dry film thickness quickly. Conventional air sprayers handle thinner finishes. They use compressed air to mix and atomize the paint. This method is less aggressive but offers more control on delicate surfaces. Electrostatic spray reduces overspray and improves coverage on complex geometries. The charged paint particles are attracted to the grounded substrate, wrapping around edges and contours that conventional spray might miss.
Brushing and rolling are limited to small areas or touch-ups. They rarely meet the thickness requirements for heavy-duty industrial coatings. If the specification calls for a certain dry film thickness per coat, manual methods often cannot deliver it consistently. A roller can leave streaks. A brush can leave bristle marks. Both methods struggle to build the uniform film required for structural protection.
Step-by-Step Application Process
- Inspect and document the substrate. Photograph the area. Note rust levels, contamination, and previous coating condition. This creates a baseline for warranty claims. A digital camera or smartphone is sufficient. The images should show the surface from multiple angles and include a scale reference.
- Remove loose material. Use wire brushes or sandblasting to strip rust, mill scale, and failing paint. The goal is a clean, sound surface. For large areas, abrasive blasting is the standard. For small or intricate parts, manual grinding or wire wheels may be necessary. The key is to remove all loose, flaking, or unstable material.
- Profile the surface. Use abrasive blasting or grinding to reach the specified profile. A rougher surface provides more mechanical keying for the binder. The profile is measured in microns. A typical heavy-duty system requires a profile of 50 to 75 microns. This roughness allows the paint to interlock with the metal peaks, increasing the contact area.
- Clean the prepared surface. Use solvent wipes or a dedicated degreaser. Remove all blasting dust and oils. The surface must be clean within the time limit stated in the specification. Blasting creates fine dust that settles quickly. If you wait too long, dust settles on the clean surface. The cleaning step must happen immediately after profiling.
- Apply the primer. Apply the first coat at the specified film thickness. The primer seals the substrate and improves adhesion between layers. The primer is often zinc-rich or epoxy-based. It provides the initial barrier against corrosion and creates a stable base for the next coats.
- Apply the topcoat. Apply the topcoat after the primer has reached the correct dry time. The topcoat provides the color, chemical resistance, and UV protection. The topcoat is usually a polyurethane or acrylic. It is designed to withstand the external environment.
- Inspect the wet film. Check for runs, sags, and dry spray. Wet defects are cheaper to fix than dry defects. Runs indicate too much paint in one area. Sags indicate too much paint or slow drying. Dry spray indicates the paint is not atomizing correctly. All three require immediate correction.
- Allow proper drying. Follow the data sheet for flash-off and cure times. Rushing this step causes softness, poor adhesion, and solvent entrapment. The coating needs time to harden before the next coat is applied. If you apply a second coat too soon, the solvents from the first coat can dissolve the fresh paint, causing adhesion failure.
- Perform final verification. Measure film thickness, check adhesion, and review the documentation. The final step confirms that the work meets the specification.
Common Application Mistakes
Applying coating over damp surfaces is a frequent error. Even a thin layer of moisture can cause immediate blistering. In high-humidity environments, the engineer must monitor dew point carefully. The substrate temperature must be at least 3 degrees Celsius above the dew point to prevent flash rusting. Flash rusting occurs when moisture condenses on the steel and oxidizes it instantly. The rust breaks through the coating before the primer can fully seal the surface.
Overspray creates waste and environmental risk. It also adds weight to the finished part. Proper masking and booth airflow control reduce overspray significantly. Overspray lands on nearby surfaces, equipment, and the floor. It must be cleaned up. It also violates environmental regulations if it accumulates.
Skipping the intermediate coat is another common mistake. A two-coat system may look fine, but a three-coat system distributes stress better. The intermediate coat bridges the gap between the primer and the topcoat. It adds thickness and flexibility. It also provides a buffer if the topcoat is damaged.
Environmental Control and Drying
Temperature and humidity directly affect the application process. Cold temperatures slow cure times. High humidity slows solvent evaporation. Both conditions can cause the coating to remain soft or tacky. In cold conditions, the solvent does not evaporate quickly enough. The paint stays wet for longer than expected. This can cause issues with the next coat or lead to solvent entrapment.
Engineers must monitor these conditions throughout the job. A single degree change can alter the drying time. If conditions drop during application, the specified cure time may no longer apply. The data sheet usually provides drying times at a standard temperature, such as 23 degrees Celsius. If the actual temperature is lower, the drying time must be extended. Ignoring this adjustment leads to adhesion failure.
Ventilation is equally important. Poor ventilation leaves solvent vapors in the booth. This creates a fire risk and can contaminate the wet film. The booth must maintain the airflow rate stated in the data sheet. Proper ventilation removes the vapors and keeps the air clean. It also prevents the accumulation of flammable gases.
Final Verification and Documentation
The final step is not just visual inspection. It requires measurement. A film thickness gauge measures the dry film thickness at multiple points. The reading must fall within the specification range. Too thin a film fails to protect. Too thick a film may crack or cure poorly. The gauge should be calibrated. The operator must be trained to take accurate readings.
Adhesion testing confirms the bond. A pull-off test or cross-cut test provides a numerical value. The result must meet the minimum standard for the application. The pull-off test uses an adhesive to bond a small stud to the coating. The stud is then pulled off with a hydraulic device. The force required to break the bond indicates the strength of the coating system. The cross-cut test involves cutting a grid in the coating and peeling the paint to see how much remains.
Documentation ties the process together. A complete record includes substrate photos, surface profile readings, coating batch numbers, application parameters, and final test results. This file protects the contractor and the client. It provides proof of work. If a problem arises years later, the documentation shows that the work was done correctly. It shifts the liability if the failure is due to a different cause.
When to Call in a Specialist
Some projects exceed the scope of standard application. Curved surfaces, small parts, and critical load-bearing structures require specialized equipment. Electrostatic spray or cathodic protection systems may be needed. Cathodic protection uses a sacrificial anode to prevent corrosion. It is often used in combination with coatings in harsh environments.
If the specification requires a high level of corrosion resistance, the engineer should consult the coating manufacturer. The manufacturer can recommend the exact application parameters for that specific substrate and environment. The manufacturer knows the chemistry of the paint. They can advise on the best primer, topcoat, and application method.
A specialist can also diagnose why a coating failed. A failed joint, a rusted fastener, or a poorly prepared edge often points to a specific application error. Finding the root cause prevents the same failure in the next project. A specialist has seen many failures. They can identify patterns and suggest corrections.
Practical Checklist for the Field Team
The field team needs a simple checklist to follow. The checklist should list every step in order. It should include the required tools, PPE, and acceptance criteria.
A good checklist reduces errors. It prevents skipped steps. It gives the team a clear standard to follow. The checklist should be printed and kept in the field. It should be accessible and easy to read. It should be in a language that the team understands.
| Step | Action | Acceptance Criterion |
|---|---|---|
| 1 | Substrate inspection | No visible defects, clean metal |
| 2 | Surface preparation | Profile reaches specified roughness |
| 3 | Cleaning | No visible oil, dust, or water |
| 4 | Primer application | Uniform wet film, correct thickness |
| 5 | Topcoat application | Smooth surface, no runs or sags |
| 6 | Final inspection | Film thickness within range |
The verification step closes the loop. It confirms that the industrial coating application met the original specification. Without it, the project remains incomplete.
The process is not complicated. It requires discipline. Each step depends on the one before it. Skipping a step breaks the chain. The engineer must respect the sequence. The contractor must follow the data sheet. The result is a coating that performs as designed.
Frequently asked questions
What is the most common reason for coating failure?
Poor surface preparation is the leading cause. If the substrate is contaminated or lacks the required profile, the coating will not bond properly.
How long should I wait between coats?
Follow the data sheet. The minimum and maximum re-coat times are critical. Applying too soon causes solvent entrapment. Applying too long can cause the film to skin over.
Can I apply coating in cold weather?
Only if the coating is rated for low temperatures. Cold slows cure times. The engineer must adjust the process or use a low-temperature product.
What is the difference between primer and topcoat?
The primer bonds to the substrate and provides corrosion resistance. The topcoat provides color, UV protection, and chemical resistance.
Do I need to test adhesion after every application?
Not every batch, but regular testing is required. The frequency depends on the project size and criticality. A pull-off test is a standard method.