Troubleshooting Blistering and Peeling in Industrial Coatings
Coating blistering and peeling stem from surface contamination, trapped moisture, or incompatible layers. This guide breaks down common symptoms, links them to root causes, and lists practical repair and prevention steps for maintenance teams.
- Identify the specific defect pattern before selecting a repair method to avoid masking the root cause.
- Surface preparation accounts for the majority of coating failures in industrial environments.
- Verify chemical compatibility between existing coatings and any new layers before applying touch-ups.
- Document every inspection and repair action to track trends and reduce recurrence.
- Use appropriate environmental controls during application to prevent moisture-related defects.
Why Do Coatings Blister or Peel?
Coating failures appear in industrial settings for a mix of reasons. Some defects show up within days of application, while others develop over months as environmental stressors build up. Maintenance teams often see blistering on structural steel, peeling on equipment housings, or lifting on cast iron parts. Each pattern points to a different underlying problem. The first step is to stop guessing. A systematic inspection reveals whether the issue is surface contamination, trapped moisture, thermal stress, or a mismatch in the coating system.
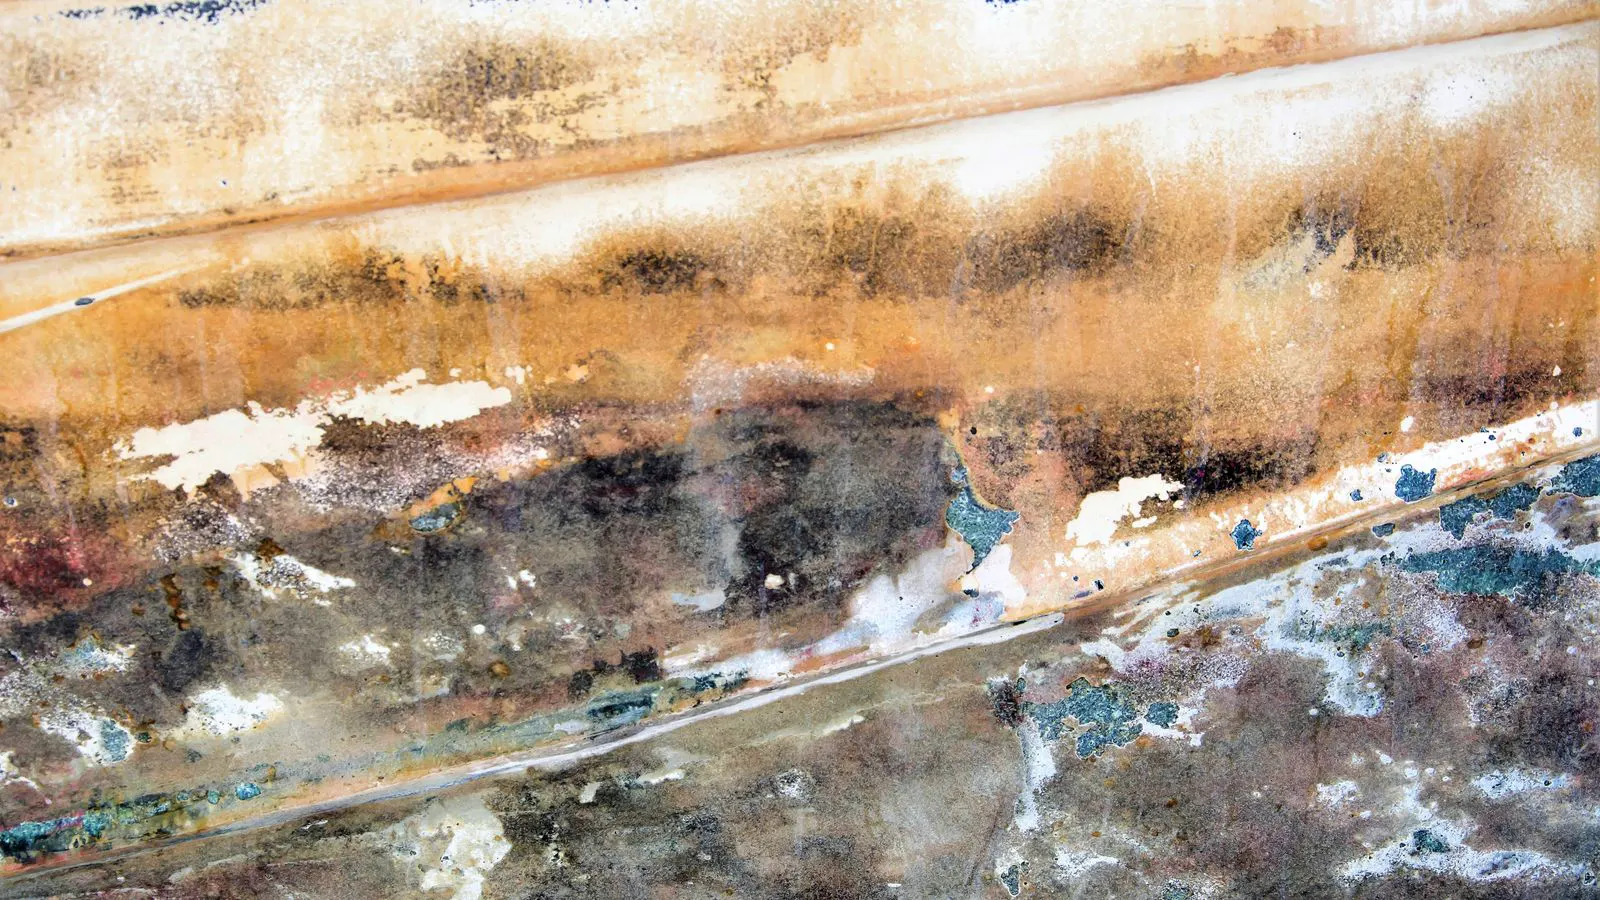
When a coating blisters, it usually means liquid or gas is trapped under the film. The pressure pushes the coating outward, creating bubbles or domes. Peeling happens when the bond between the coating and the substrate weakens. This can result from poor adhesion, contamination, or a coating that simply does not match the surface it is on. Both defects shorten the service life of the asset and can lead to corrosion if left unaddressed.
Understanding the difference matters because the fixes are different. A blister from moisture may require drying and re-application, while a blister from a chemical reaction might need full removal and a new chemical system. Getting the diagnosis right saves time and cost. It also prevents the same failure from returning in the next cycle.
How to Read the Defect Pattern
The shape, location, and texture of a defect give strong clues about the cause. A maintenance team should examine the area closely before deciding on a repair path. Look at the edges of the blister or peel. Are they sharp or ragged? Does the coating lift in sheets or in small islands? Check the substrate underneath. Is it dry and clean, or damp and corroded? These observations form the basis of the troubleshooting table below.
Blistering that appears as small, evenly spaced bubbles often points to trapped solvent or moisture. If the bubbles are larger and irregular, they may indicate a chemical reaction or a void in the substrate. Peeling that occurs in broad, flat sheets suggests a loss of adhesion at the interface. Peeling in small, scattered patches may point to a localized contamination issue or a thin spot in the coating.
Location matters just as much as shape. Defects near the edges of a panel often relate to poor surface preparation or insufficient coverage. Blisters on vertical surfaces can result from running or sagging during application. Peeling in areas with high heat or vibration may indicate thermal or mechanical stress. Mapping the defect across the asset helps identify patterns that a single inspection might miss.
Common Symptoms, Likely Causes, and Fixes
The table below summarizes the most frequent problems maintenance teams encounter. It lists the visible symptom, the most likely root cause, and the recommended action. This format allows a technician to move quickly from observation to action without getting lost in theory.
| Symptom | Likely cause | What to do |
| Symptom | Likely cause | What to do |
| Small, uniform bubbles across a flat surface | Trapped solvent or moisture during application | Allow full drying time, check humidity, and re-apply if necessary |
| Large irregular domes or blistering | Chemical reaction or voids in the substrate | Remove affected area, treat substrate, and verify coating compatibility |
| Large sheets of coating lifting from steel | Poor adhesion due to contamination or inadequate surface prep | Strip affected coating, clean and pre-treat surface, and re-coat |
| Scattered small patches peeling off | Localized dirt, oil, or previous coating contamination | Grind or clean affected spots, degrease, and touch-up with compatible coating |
| Blistering and peeling on vertical surfaces | Running, sagging, or insufficient film thickness | Check application technique, ensure proper viscosity, and re-coat to specified thickness |
| Defects appearing after exposure to heat or chemicals | Thermal stress or chemical attack on the coating | Identify the stressor, select a more resistant coating system, and repair as needed |
This table covers the core scenarios. In practice, multiple causes can overlap. A surface that has both oil contamination and trapped moisture will show a combination of peeling and blistering. The repair must address all contributing factors, not just the most visible one.
Surface Preparation: The Most Common Root Cause
Surface preparation is the foundation of any durable coating. In industrial environments, this step gets rushed or skipped under time pressure. The result is predictable. Coatings applied to oily, damp, or poorly cleaned surfaces will fail. The substrate must be dry, clean, and properly roughened before any coating can bond effectively.
Oil, grease, and dust are the most common contaminants. They create a barrier that prevents the coating from making direct contact with the metal. Even a thin film of oil can cause adhesion failure. Solvent cleaning, degreasing, or mechanical cleaning are standard approaches. The choice depends on the level of contamination and the equipment available. Water-based cleaners work for light dirt, but heavy oil often requires a dedicated degreaser or abrasive blasting.
Moisture is another major issue. Condensation on cold steel during the night or in humid conditions can be trapped under the coating. If the surface is not dry when the coating is applied, the moisture stays sealed in. As the coating cures, the trapped water can expand or react, leading to blistering. Checking the substrate temperature and humidity before application is a simple but effective control.
Surface roughness also affects adhesion. A smooth, clean surface may not hold a coating well. Abrasive blasting, sanding, or mechanical profiling creates a texture that gives the coating something to grip. The target profile depends on the coating type and the service environment. For high-performance systems, a rougher profile is usually required. For light-duty applications, a light scuff may be enough. The key is consistency. Every part of the surface should have the same level of preparation.
Application Conditions and Technique
Even a perfectly prepared surface can fail if the coating is applied under poor conditions. Temperature, humidity, and airflow all affect how the coating behaves. Solvent-based coatings evaporate quickly, while water-based systems dry more slowly. If the environment is too humid, water-based coatings may not dry properly. If it is too cold, solvents may not evaporate, and the coating may remain tacky for longer than expected.
Application technique is just as important. Spray equipment must be set up correctly. Nozzles, pressure, and distance from the surface all determine how evenly the coating lays down. Too much pressure or too close a distance can cause sagging or running. Too little coverage can leave thin spots that are prone to peeling. Brushing and rolling have their own issues. Insufficient overlap can create weak lines. Too much pressure can thin the film.
Film thickness is a critical factor. Coatings need to reach a specified minimum thickness to provide the intended protection. Thin areas are vulnerable to mechanical damage, chemical attack, and moisture ingress. A thickness gauge or visual check can help verify coverage. Multiple thinner coats are often better than a single thick one. This reduces the risk of defects and ensures even drying.
Curing time is another area where shortcuts lead to failure. Coatings need time to fully cure before being exposed to their service environment. If a painted part is returned to service too soon, the coating may not have reached its full strength. Mechanical stress, heat, or chemicals can then degrade the film. The data sheet for the specific coating should be checked for cure times at the expected ambient temperature.
Repairing Failed Coatings
Repairing a failed coating is not the same as applying a new one. The existing defect must be addressed first. Leaving loose or flaking material in place will allow the new coating to fail in the same way. The repair area needs to be cleaned, stripped, and prepared just like a fresh application. This means grinding off the damaged coating, cleaning the exposed substrate, and ensuring the edges are sound.
Once the area is prepared, a compatible coating must be selected. Using a different chemical system on top of an old one can lead to adhesion problems. Some coatings do not bond well with others. The manufacturer’s technical data sheet should be checked for compatibility. In some cases, a primer or intermediate coat is needed to bridge the gap between the old and new systems.
The repair should extend beyond the visible defect. A small blister can hide a larger area of weak adhesion. Grind back until the coating is firmly bonded and the substrate is clean. Feather the edges of the repair area so the new coating blends smoothly with the surrounding surface. Apply the repair coating to the specified thickness and allow it to cure fully before returning the asset to service.
Preventing Blistering and Peeling
Prevention is always cheaper than repair. A few simple practices can significantly reduce the frequency of coating failures. Surface preparation standards must be enforced and documented. A written checklist for cleaning, profiling, and moisture checks helps ensure consistency. Operators should verify the substrate is ready before applying any coating.
Environmental controls are equally important. Monitoring temperature and humidity during application prevents moisture-related defects. Working in enclosed or controlled spaces can help, but even outdoors, weather conditions must be considered. Rain, high humidity, and extreme cold all affect coating performance.
Coating selection must match the service environment. A coating that works well in a dry warehouse may fail in a coastal or chemical-heavy area. The material, temperature range, and chemical exposure should all be factored in. A coating selection checklist for heavy machinery parts or similar assets can help guide this decision. The goal is to choose a system that can withstand the specific stresses of the application.
Maintenance teams should also track defects over time. Keeping records of where and when failures occur reveals patterns. If a particular area of a plant or a specific type of equipment fails repeatedly, the root cause may be an environmental factor or a process issue that needs addressing. Documentation turns isolated incidents into actionable insights.
When to Call for Professional Help
Some coating failures are beyond the scope of routine maintenance. Extensive blistering, widespread peeling, or defects on critical safety components may require a specialist. Professional coating contractors have access to advanced surface preparation equipment, testing tools, and experience with complex systems. They can diagnose root causes that are not obvious to a general technician.
A professional assessment also includes reviewing the original coating system. If the system was not selected correctly for the environment, a simple touch-up will not fix the problem. A complete strip and re-coat with a more suitable system may be necessary. This is a larger investment, but it can extend the life of the asset significantly.
Cost and downtime must be weighed against the risk of failure. A small defect on a non-critical surface may be worth fixing with a minor touch-up. A defect on a pressure vessel or a structural member may require a full assessment and repair. The decision should be based on the severity of the defect, the criticality of the asset, and the likelihood of recurrence.
Final Thoughts
Coating blistering and peeling are common problems in industrial settings, but they are not always mysterious. The defects are usually the result of preventable causes. Surface contamination, trapped moisture, poor application technique, and incompatible coating systems are the main culprits. By learning to read defect patterns, preparing surfaces properly, and controlling application conditions, maintenance teams can reduce failures and extend the life of their assets.
The troubleshooting table and the steps outlined above provide a practical framework for diagnosing and repairing coating defects. The goal is to move quickly from observation to action. A systematic approach saves time, reduces cost, and improves reliability. Coating maintenance is a continuous process, and staying on top of it keeps industrial assets in good working order.
Frequently asked questions
Can I just paint over a blistered area?
No. Painting over a blister without addressing the root cause will likely fail. The blister must be removed, the substrate cleaned and prepared, and a compatible coating applied.
How do I know if the surface is too wet for coating?
Check the substrate temperature and humidity. If condensation is present or the surface feels cold to the touch, it is likely too wet. Allow the surface to dry or use a moisture meter.
What is the difference between blistering and peeling?
Blistering occurs when liquid or gas is trapped under the coating, pushing it outward. Peeling happens when the bond between the coating and the substrate weakens, causing the coating to lift.
How long should I wait before re-coating a repaired area?
Follow the cure time specified in the coating manufacturer's data sheet. Re-coating before full cure can lead to adhesion problems and reduced performance.
Do I need to remove all old coating when repairing?
Only the damaged and loose coating needs to be removed. Sound, firmly bonded coating can often be left in place. The repair area should be cleaned, profiled, and feathered to blend with the surrounding surface.