Pre-Coating Inspection Checklist for Metal Parts
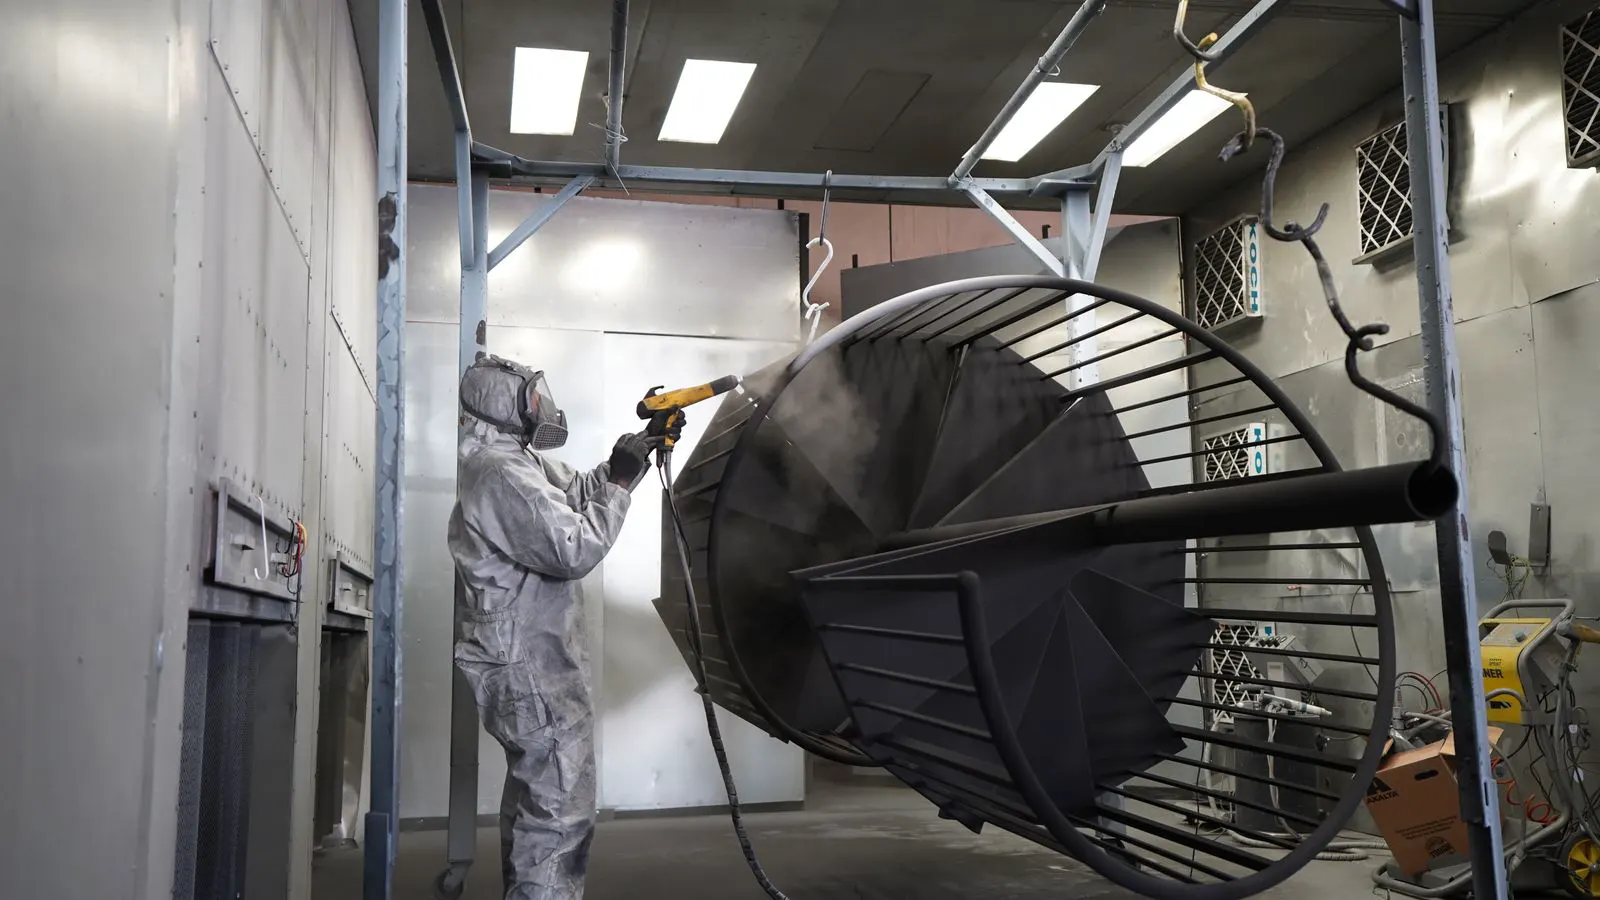
Engineers need a reliable method to verify parts before powder application. This checklist covers surface preparation, dimensional checks, and visual quality control steps. It helps teams identify defects early and reduce costly rework after parts enter the oven.
- Verify surface preparation by checking for oil, rust, and dust before loading the parts.
- Use a structured inspection checklist to catch dimensional or mechanical defects before coating.
- Document findings with photos and part numbers to trace quality issues back to the source.
- Coordinate with the powder coating provider to align on tolerances, edge radius, and color standards.
- Reject parts with severe defects early to avoid wasting cure time and powder.
Why Pre-Coating Inspection Matters
Parts that fail inspection after coating are expensive to manage. The finish may look acceptable on the surface, but a defect underneath can cause corrosion, poor adhesion, or mechanical failure. A structured pre-coating inspection checklist helps engineers catch these problems before the powder coating process begins.
The cost of a defect found after the cure cycle is not just the material value of the part. It includes the cost of stripping, re-preparing, and recoating. Stripping is a destructive process that often requires aggressive chemicals or thermal methods. It removes the original surface finish and can alter the metal substrate. If the part is a complex assembly with tight tolerances, stripping may make it impossible to reuse. The part may need to be scrapped entirely.
A structured pre-coating inspection checklist helps engineers catch these problems before the powder coating process begins. This routine shifts quality control from a reactive position to a proactive one. Instead of discovering a failure during final acceptance testing, the team identifies the root cause during the preparation phase. This allows for correction before the part enters the cure oven.
This guide focuses on practical checks that teams can perform in the shop or at the supplier site. It covers surface condition, part geometry, handling, and documentation. The goal is to build a repeatable routine that supports quality control and reduces the risk of rejected batches. The checks are designed to be performed by trained shop floor personnel or quality inspectors. They require standard hand tools, basic measuring instruments, and a clear understanding of the drawing and coating specification.
Check Surface Preparation First
Surface preparation is the foundation of a durable powder coating finish. Before parts reach the coating line, the metal surface must be clean and free of contaminants that prevent proper adhesion. The powder coating process relies on electrostatic attraction and thermal fusion to bond the coating to the substrate. If the substrate is contaminated with oil, grease, or moisture, the bond will be weak. The coating may peel, blister, or flake under minimal stress.
The standard cleaning process involves degreasing, etching, and rinsing. However, the effectiveness of these processes depends on the starting condition of the part. A part that arrives at the shop with heavy scale or oil will not clean properly. The cleaning bath will become saturated with contaminants, reducing its efficiency for subsequent parts. This cross-contamination can affect an entire batch.
- Check for oil and grease. Wipe a small area with a lint-free cloth and a solvent. If a dark mark appears, the part needs degreasing. Look at the cloth. A clean solvent wipe should leave the cloth dry or lightly damp. If the cloth becomes dark, oily, or stained, the part is contaminated. This is common on parts that have been stored in the factory environment or handled without gloves.
- Inspect for rust or oxidation. Look for red-brown discoloration on steel parts. Surface rust must be removed by abrasion or chemical treatment. Do not spray paint over rust. The rust will continue to grow underneath the coating. It will push the coating off the metal. Use a wire brush, abrasive blasting, or a chemical rust converter to remove the oxide layer.
- Look for dust and loose particles. Use a flashlight at a low angle to spot dust buildup in recesses, threads, and machined surfaces. Dust traps moisture and creates a barrier between the metal and the coating. It can also cause pinholes in the finish. Blow out recesses with compressed air, but ensure the air is dry and oil-free.
- Verify chemical conversion coating. If the process includes a zinc or iron phosphate layer, check for uniform color and absence of blots or streaks. The conversion coat should be a consistent, matte finish. Blots indicate incomplete drying or uneven application. Streaks suggest the part was not rinsed properly. These defects will show through the powder coating and cause adhesion failure.
- Confirm passivation on stainless steel. Stainless parts often require passivation to improve corrosion resistance. Look for a consistent, clear surface without white residue. White residue is usually a sign of incomplete rinsing or a reaction with cleaning chemicals. Passivation improves the chemical resistance of the stainless steel. It helps the powder coating bond to the passive surface.
Red flags: Dark streaks after wiping, orange spots, chalky residue, or visible oil rings. These indicate incomplete cleaning or contamination. If you see these signs, stop the process. Do not load the part. Identify the source of the contamination and correct it.
Verify Part Geometry and Tolerances
The powder coating process adds a layer of material. This thickness can affect assembly, clearance, and function. Powder coating typically adds a dry film thickness of 40 to 150 microns, depending on the application. This may sound small, but it is significant for tight fits. A part that fits perfectly before coating may not fit after coating. The coating adds to the outside dimensions. It does not reduce the inside dimensions.
Inspect parts to ensure they meet drawing requirements before coating. The drawing is the source of truth. It defines the acceptable range of dimensions. If the part is out of tolerance before coating, it will be out of tolerance after coating. In some cases, the part will fail to assemble. This leads to rework or scrap.
- Check critical dimensions. Measure bore diameters, hole positions, and flatness. Use calipers or micrometers as specified in the drawing. Focus on dimensions that affect assembly. If a part bolts to a flange, the hole position and diameter are critical. A deviation of even 0.1 millimeters can prevent the bolt from going through.
- Inspect edge radius and fillets. Sharp edges can be a safety hazard and may cause powder buildup. Confirm fillet sizes match the drawing. Sharp edges can cut operators during handling. They can also cause high field strength in the powder coating process. This leads to powder buildup in the corners and thin areas in the center. Fillets should be smooth and consistent.
- Examine mating surfaces. If parts bolt to other components, verify that bolt holes are clean and free of burrs. Burrs inside holes can prevent fasteners from seating properly. They can also concentrate stress and cause cracking. Deburr all holes before coating.
- Check for warpage. Place parts on a flat surface and look for gaps at the edges. Use a straightedge if available. Warpage is common in sheet metal parts that have been heat treated or stamped. If the part is warped, the coating will be uneven. It will be thicker on one side and thinner on the other. This affects the finish and the structural integrity of the coating.
- Verify thread condition. Threads must be clear of chips and burrs. A damaged thread will not accept fasteners after coating. The powder coating will fill the thread if the threads are not masked. This makes the threads unusable. Mask threads carefully. Use thread plugs or tape.
Red flags: Burrs on edges, crushed threads, visible warp, or holes that are too small for the specified fastener. If you find these defects, measure the part against the drawing. If it is out of tolerance, quarantine the part. Do not attempt to coat it.
Inspect for Material and Structural Defects
Defects in the base metal can compromise the finished part. Visual inspection and, where required, non-destructive testing should be performed before coating. The powder coating is a surface treatment. It does not fix structural problems. If the metal is weak or cracked, the coating will not save it. The part may fail in service.
- Look for cracks. Inspect welds, machined surfaces, and high-stress areas. Use a mirror and light for recessed zones. Cracks are often the most dangerous defect. They can grow over time and cause sudden failure. Use a dye penetrant test if the drawing requires it. The dye penetrates the crack and is visible when a developer is applied.
- Check weld quality. Look for porosity, undercut, and excessive spatter. Weld defects can trap moisture and cause coating failure. Porosity is a small void in the weld. It can trap moisture. When the part is heated in the cure oven, the moisture expands and can push the coating off. Undercut is a groove in the weld leg. It creates a stress concentrator. Spatter is metal that has been splashed onto the surface. It is difficult to clean and can cause pinholes in the coating.
- Verify casting porosity. Cast parts often have internal voids. Confirm that any required X-ray or ultrasonic testing has been completed and documented. Internal voids can trap gas or moisture. They can also weaken the part. If the part is for a pressure vessel or a safety-critical application, internal voids are not acceptable.
- Inspect for machining marks. Deep tool marks on visible surfaces can show through the powder coating. Machining marks are grooves left by the cutting tool. If they are deep, they will be visible in the finish. They can also trap dust and dirt. Light sanding or polishing may be required to remove deep marks.
- Check for corrosion pitting. Look for small craters in the surface. These can be signs of active corrosion or poor storage. Pitting is a localized form of corrosion. It removes material from the surface. If the pitting is deep, it can weaken the part. It can also cause the coating to fail because the metal underneath is not sound.
Red flags: Cracks, deep pitting, porosity in welds, or visible corrosion that extends beyond the surface layer. If you find these defects, assess the severity. Minor pitting may be acceptable if it is within the specification. Cracks and deep porosity are usually not acceptable.
Review Coating Specifications and Color Standards
Before parts enter the line, the team must confirm that the coating specification is understood and available. This step prevents mismatches between the customer requirement and the final finish. The specification is the contract between the supplier and the customer. It defines the appearance, properties, and performance of the coating.
The specification may include details on color, gloss, thickness, and finish type. It may also include requirements for masking, cure temperature, and time. If the specification is unclear, the team may produce a finish that does not meet the customer’s expectations. This leads to rework or rejection.
- Confirm color and gloss. Use a physical color chip or a digital reference approved by the customer. Compare the part to the standard under consistent lighting. Color is subjective. It depends on the lighting conditions. Use a standard light source, such as a D65 light box, if available. Compare the part to the chip under the same light. Do not compare it under daylight or fluorescent light.
- Check finish type. Verify whether the part needs a textured, flat, or smooth finish. The finish type affects the appearance and the feel of the part. A textured finish hides surface imperfections. A smooth finish shows every defect. The specification should state the required finish type.
- Review film thickness requirements. Some applications require a minimum or maximum dry film thickness. Confirm that the specification is clear. The thickness affects the durability of the coating. A thin coating may wear through quickly. A thick coating may crack or peel. The specification should state the minimum and maximum thickness.
- Check for masking requirements. Identify areas that must remain uncoated, such as threaded holes, contact surfaces, or sensor zones. Masking is critical. If a threaded hole is coated, it is useless. If a sensor zone is coated, it may not function. Use masking tape or thread plugs. Apply the tape carefully to avoid lifting.
- Confirm cure temperature and time. Ensure the powder and oven settings match the part material and thickness. The cure process is critical. If the temperature is too low, the coating will not fuse. If the time is too short, the coating will be soft. The powder and the oven settings must match the specification.
Red flags: Missing color chip, unclear thickness specification, or unmarked masking areas. If you find these issues, stop the process. Do not proceed with coating. Clarify the specification with the customer or the quality manager.
Prepare Documentation and Traceability
A checklist is only as useful as the record it creates. Documentation supports quality control and helps trace issues back to the source. If a defect is found in the field, you need to know which batch of parts it came from. You need to know who inspected the parts and what the results were.
Documentation also supports continuous improvement. It helps identify trends. If a specific defect is found repeatedly, you can investigate the root cause. If you do not have records, you cannot investigate.
- Record part number and batch ID. Assign a unique identifier to each lot of parts. The batch ID should be visible on the part or on a tag attached to the part. This ensures that the part is tracked through the process.
- Capture photos. Photograph defects, part numbers, and reference standards. Use a consistent angle and lighting. Photos are useful for communication. They help the customer understand the defect. They also help the team understand the root cause.
- Log measurements. Record all dimensional checks in a digital or paper log. The log should include the date, the inspector’s name, and the measured value. Compare the measured value to the drawing tolerance.
- Sign off the inspection. Have the inspector and the reviewer sign the checklist. The signature indicates that the inspection was performed and that the part meets the requirements. It also provides legal accountability.
- Store records. Keep the documentation with the part history. Retain records for the required period. The retention period depends on the industry and the customer. For safety-critical parts, records may need to be kept for many years.
Red flags: Missing part numbers, unsigned checklists, or photos that do not match the recorded batch. If you find these issues, correct them immediately. Do not proceed with the next step.
Common Mistakes to Avoid
- Skipping the solvent wipe test. It is a quick check that catches oil and grease. Many teams skip this step because they are in a hurry. The solvent wipe test takes less than a minute. It is one of the most effective ways to catch contamination. Do not skip it.
- Relying on visual inspection alone for small defects. Use a light source and a mirror. Small defects, such as cracks or porosity, are difficult to see. Use a light at a low angle to highlight the defect. Use a mirror to inspect recesses.
- Not checking mating surfaces. Coating thickness can prevent parts from assembling. If you do not check the mating surfaces, the part may not fit. Measure the critical dimensions. Ensure that the holes are clean and free of burrs.
- Ignoring edge radius. Sharp edges can cut operators and cause powder buildup. Inspect the edges. Ensure that they are smooth and consistent. If an edge is sharp, deburr it.
- Failing to document findings. Without records, it is difficult to trace a defect. Document every inspection. Record the results. Sign the checklist. Store the records.
| Check Area | What to Look For | Acceptable Condition | Red Flag |
|---|---|---|---|
| Surface Cleaning | Oil, grease, dust, rust | Clean, dry, uniform surface | Dark marks, orange spots, residue |
| Geometry | Dimensions, edges, flatness | Within drawing tolerances | Burrs, warp, small holes |
| Material | Cracks, welds, porosity | Sound metal, no defects | Cracks, deep pitting, porosity |
| Coating Spec | Color, thickness, masking | Matches approved standard | Missing chip, unclear spec |
| Documentation | Part ID, photos, sign-off | Complete, signed, stored | Missing ID, unsigned log |
Final Verification Before Loading
Before parts are loaded onto the carrier, perform a final visual check. This last step catches issues that may have been missed during detailed inspection. The final check is a quick review. It is not a detailed measurement. It is a visual confirmation that the part is ready for the coating line.
The final check should be performed by a different person than the one who performed the detailed inspection. This reduces the risk of missing a defect. A fresh pair of eyes can catch problems that the inspector may have become blind to.
- Check for handling damage. Look for scratches or dents from transport. Handling damage can occur during the inspection process. If the part is scratched, it may need to be polished or recoated.
- Verify masking integrity. Ensure tape or plugs are secure and clean. If the tape is lifting, it may allow powder to get into the masked area. If the tape is dirty, it may cause a defect in the finish.
- Confirm part orientation. Parts should be loaded in the specified position to prevent powder buildup. The orientation affects the flow of the powder. If the part is loaded incorrectly, the coating may be uneven.
- Check carrier spacing. Allow enough room between parts to ensure airflow and even coating. If the parts are too close together, the powder may not be able to reach all surfaces. This leads to thin spots or bare areas.
- Review the batch list. Match the physical parts to the digital work order. Ensure that the correct parts are being coated. A mismatch can lead to the wrong finish or the wrong part being shipped.
Red flags: Damaged parts, loose masking, crowded carriers, or mismatched part numbers. If you find these issues, stop the process. Do not load the parts. Correct the issue before proceeding.
A simple pre-coating inspection checklist turns a vague hope of quality into a verified process. It gives engineers confidence that parts are ready for the next step. It also creates a paper trail that supports quality control and customer trust. Use it as a baseline and adapt it to the specific needs of your parts and processes. The checklist is a tool. It is not a replacement for judgment. Use your experience to identify defects that the checklist does not cover.
Frequently asked questions
How do I check if a part is free of oil?
Wipe a small area with a solvent and a lint-free cloth. If a dark mark appears on the cloth, the part contains oil or grease and needs cleaning.
What is the typical film thickness for powder coating?
Thickness varies by application. General industrial parts often fall in the range of 50 to 150 microns. Always follow the specific drawing or customer requirement.
Do I need to inspect parts after every cleaning cycle?
Yes. Inspect parts after each cleaning cycle to ensure no contamination has been introduced. This is part of a standard quality control routine.
How should I document defects found during inspection?
Record the part number, batch ID, and a clear description of the defect. Take a photo if possible and note the location on the part.
Can I skip inspection if the supplier has a good reputation?
No. Supplier reputation does not guarantee that every batch meets your specific requirements. Inspect each batch to verify compliance.